
Hey lovelies! It has been so long since I have sat down and crafted some stuff that was soley "just for fun" and was not for
Yellow Heart Art. Now don't get me wrong, I tell Bubs all the time that I love
Yellow Heart Art so much that I would do it for free. But sometimes its nice just making a lil bling bling for yo'self-ya know? This necklace is so easy to make and I have already gotten compliments on it from some chicks at sephora
(and those sephora chicks know their shiz) (at least I am assuming they do, I mean they make people look pretty for a living...)
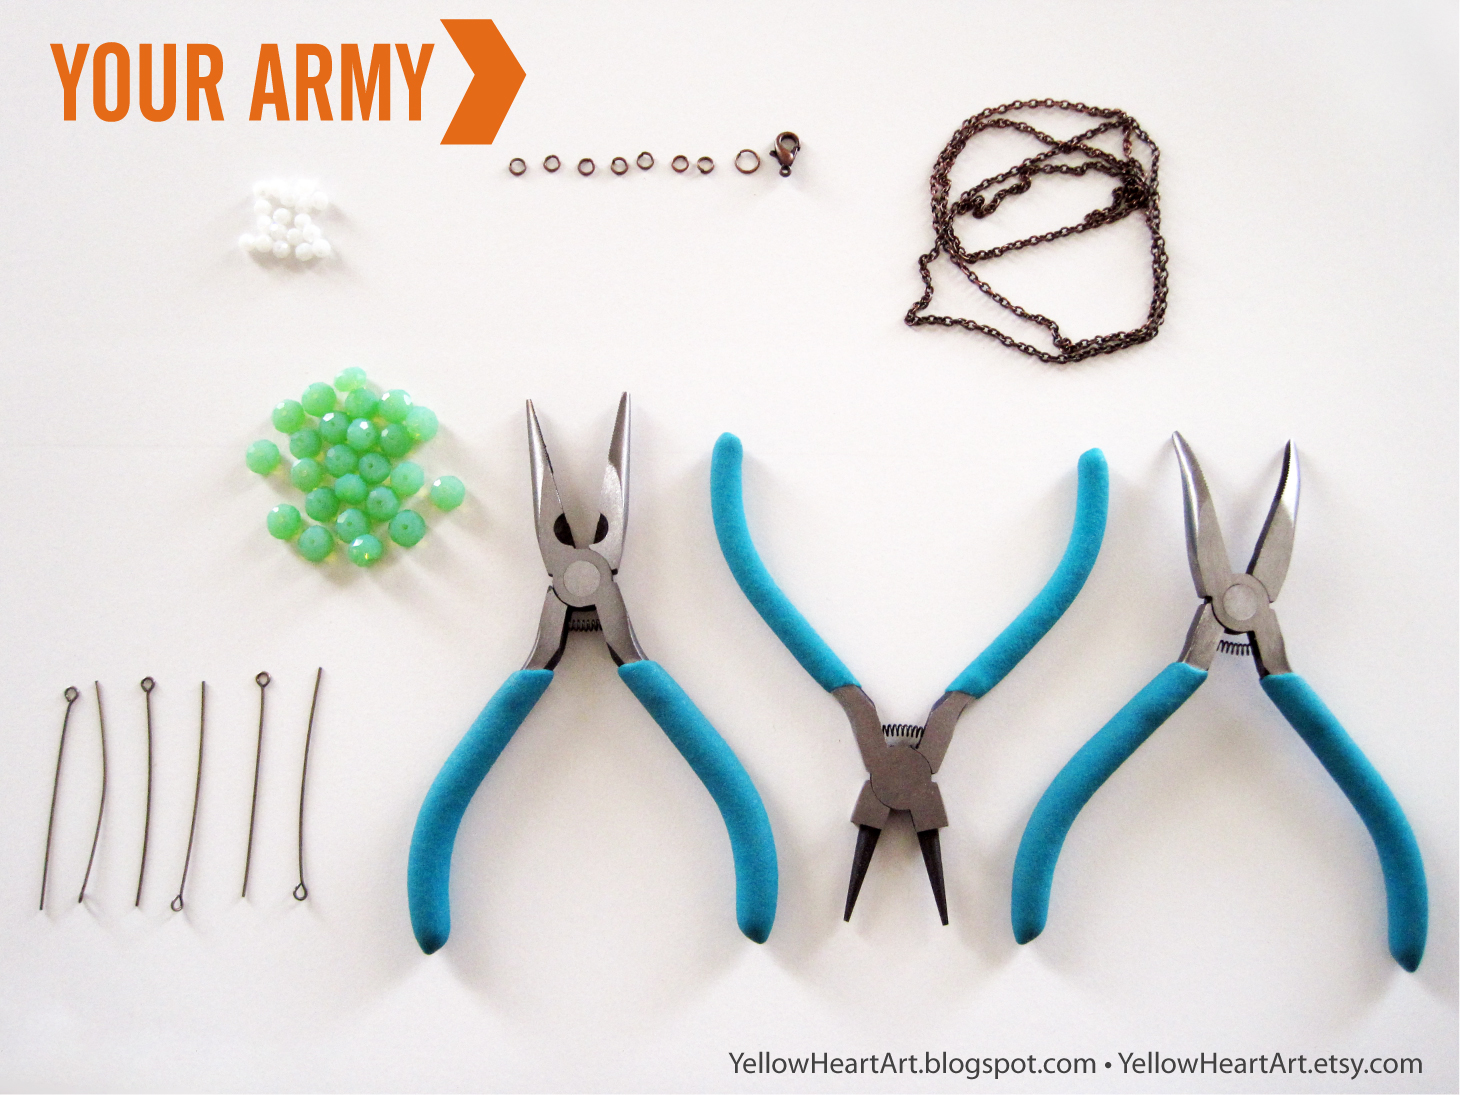
You Will Need:
• Beads (colors and amount up to how many "arrow heads" you want)
• Lobster Clasp
• Jump Rings
• Chain
• Eye pins
• Jewelry Pliers
Step 1: Take 1 set of beads and place on eye pin, leave room at the end to curl over the end of the eye pin.
Step 2: Take your round headed jewelry pliers and curl the ends of the eye pin. Don't close all the way just yet.
Step 3: Keep going till you have an even number of beads strung up on eye pins with the ends of the eye pins curled up.
Step 4: Take 2 sets of the same beads and link 2 open eye pins together so it forms a "V" shape
Step 5: Take your flat set jewelry piers and "clamp down" the end of the eye pin you curled to close it up. Repeat steps 4&5 to the rest of your sets till you have 3 "V"s
Step 6: Take one of your jump rings and open it up slightly with your jewelry pliers.
Step 7: Place the opened jump ring and link it through the last link on your jewelry chain. Take one end of your "V" beads and link that into the jump ring as well.
Step 8: Take your jewelry pliers and close up your jump ring. Repeat on the other side of your beads.
Step 9: Your beads should look like the pic above. This will be the bottom row of your arrow head necklace.
Step 10: repeats steps 7-8 with your next row of beads, this time looping your jump ring through one of the links on the chain at a higher point.
Step 11: Add your 3rd row using steps 7-8. Make sure they are evenly spaced by counting the number of links in between the 3 rows.
Step 12: I made my necklace about 24" long so I didn't need to do this step, but if your necklace is not long enough just open up one of the links on your chain, add a jump ring and a lobster clasp so you can get it round your neck.
Bada Bing.
can you dig it?
You can make as many rows as you want. Mix it up homegirl! I would love to see any necklaces you guys have made with this tutorial so be sure to link 'em below <3
xoxo
Leonora
pssst if ya dig my other necklace you can nab one
here ;) thanks son of a sailor!


Oh wow this is so lovely!! Such a great idea and quite simply but so beautiful. I wish I had a chain now but I am on my way out... oh you're such a bad influence ;) xx
ReplyDeletebrilliant! I love this inspiration...where are my beads so I can get my craft on?!
ReplyDeleteLove this! So beautiful! :)
ReplyDeleteSUPER CUTE!!! pinning it!
ReplyDeleteUmmmm that is adorable!!! Love love love. Did I mention I love it yet? I love it! :)
ReplyDeleteyour hair is so model-esque in those photos. did you have a fan blowing your tresses like that?
ReplyDeleteSo cute! I might even have everything to make that already...
ReplyDeleteChristen
www.anunordinaryhello.com
Cute!! (and you are SO pretty!)
ReplyDeleteSuper cute idea! I'll try it soon and let you know how it went! Lol
ReplyDeleteI really like your blog :) i will pass here again, definitely!!
xx Zoe