Pages

Wednesday, February 29, 2012

Rue Magazine Featured Us!

Um you guys, I don't even know what to say.

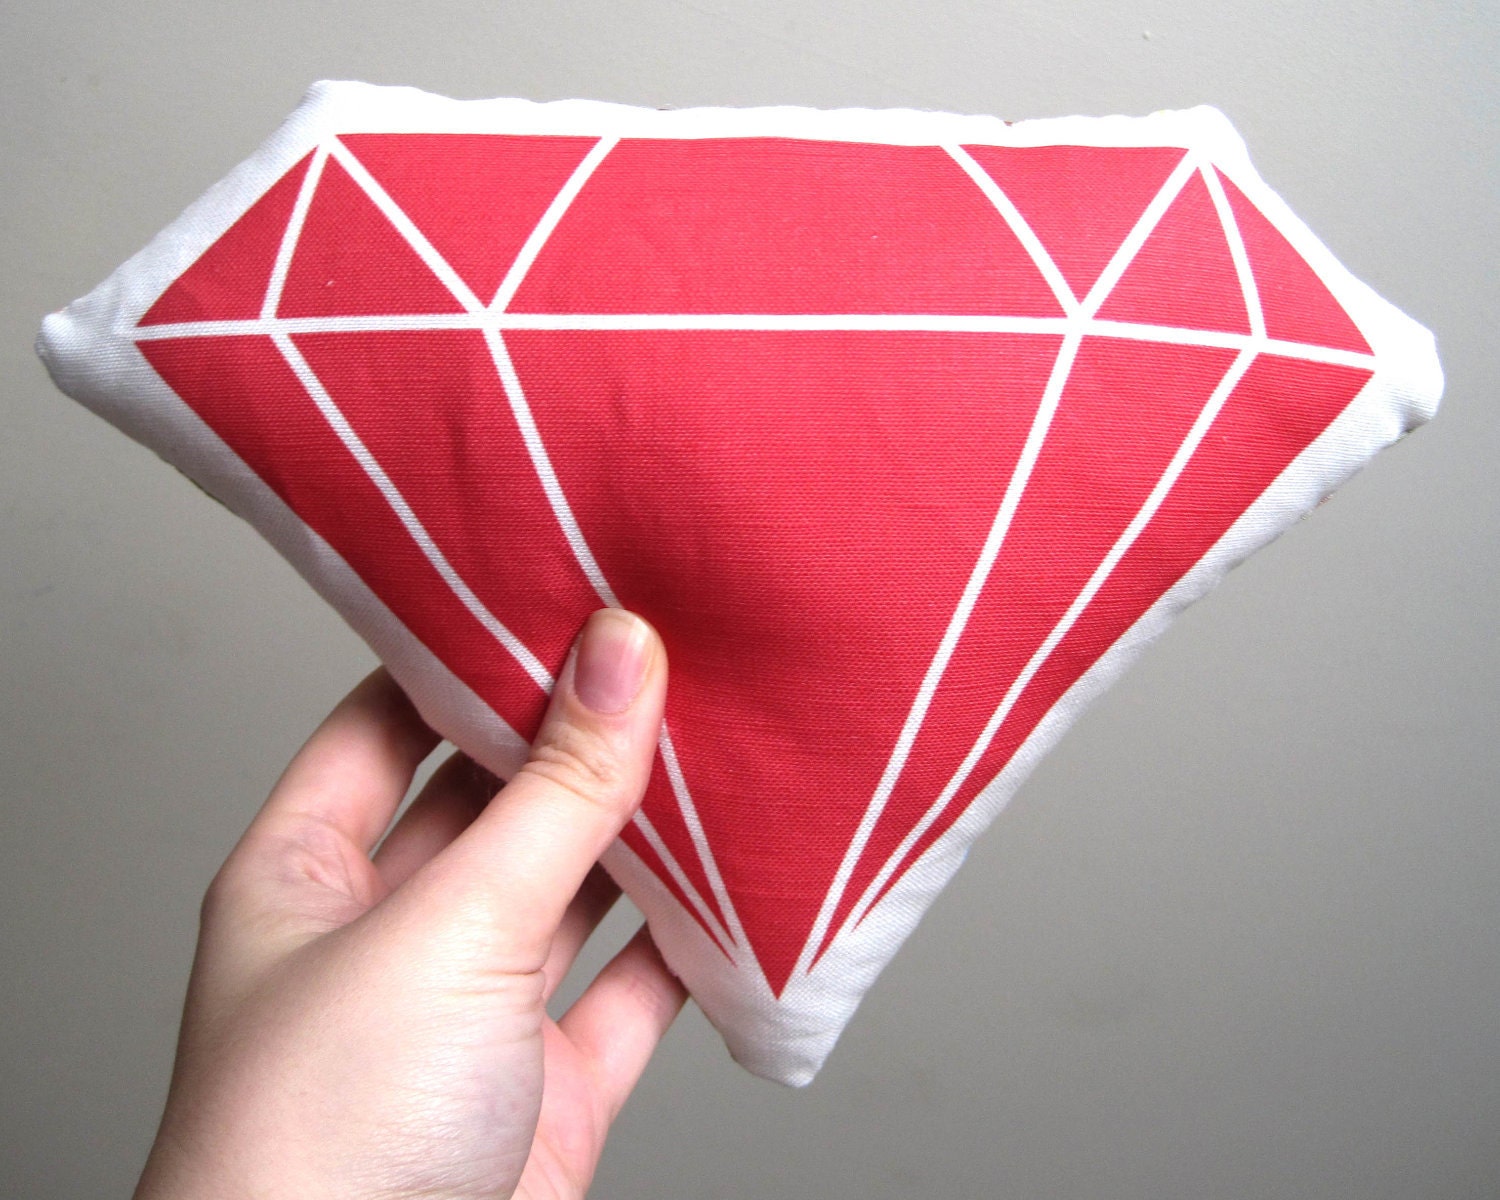
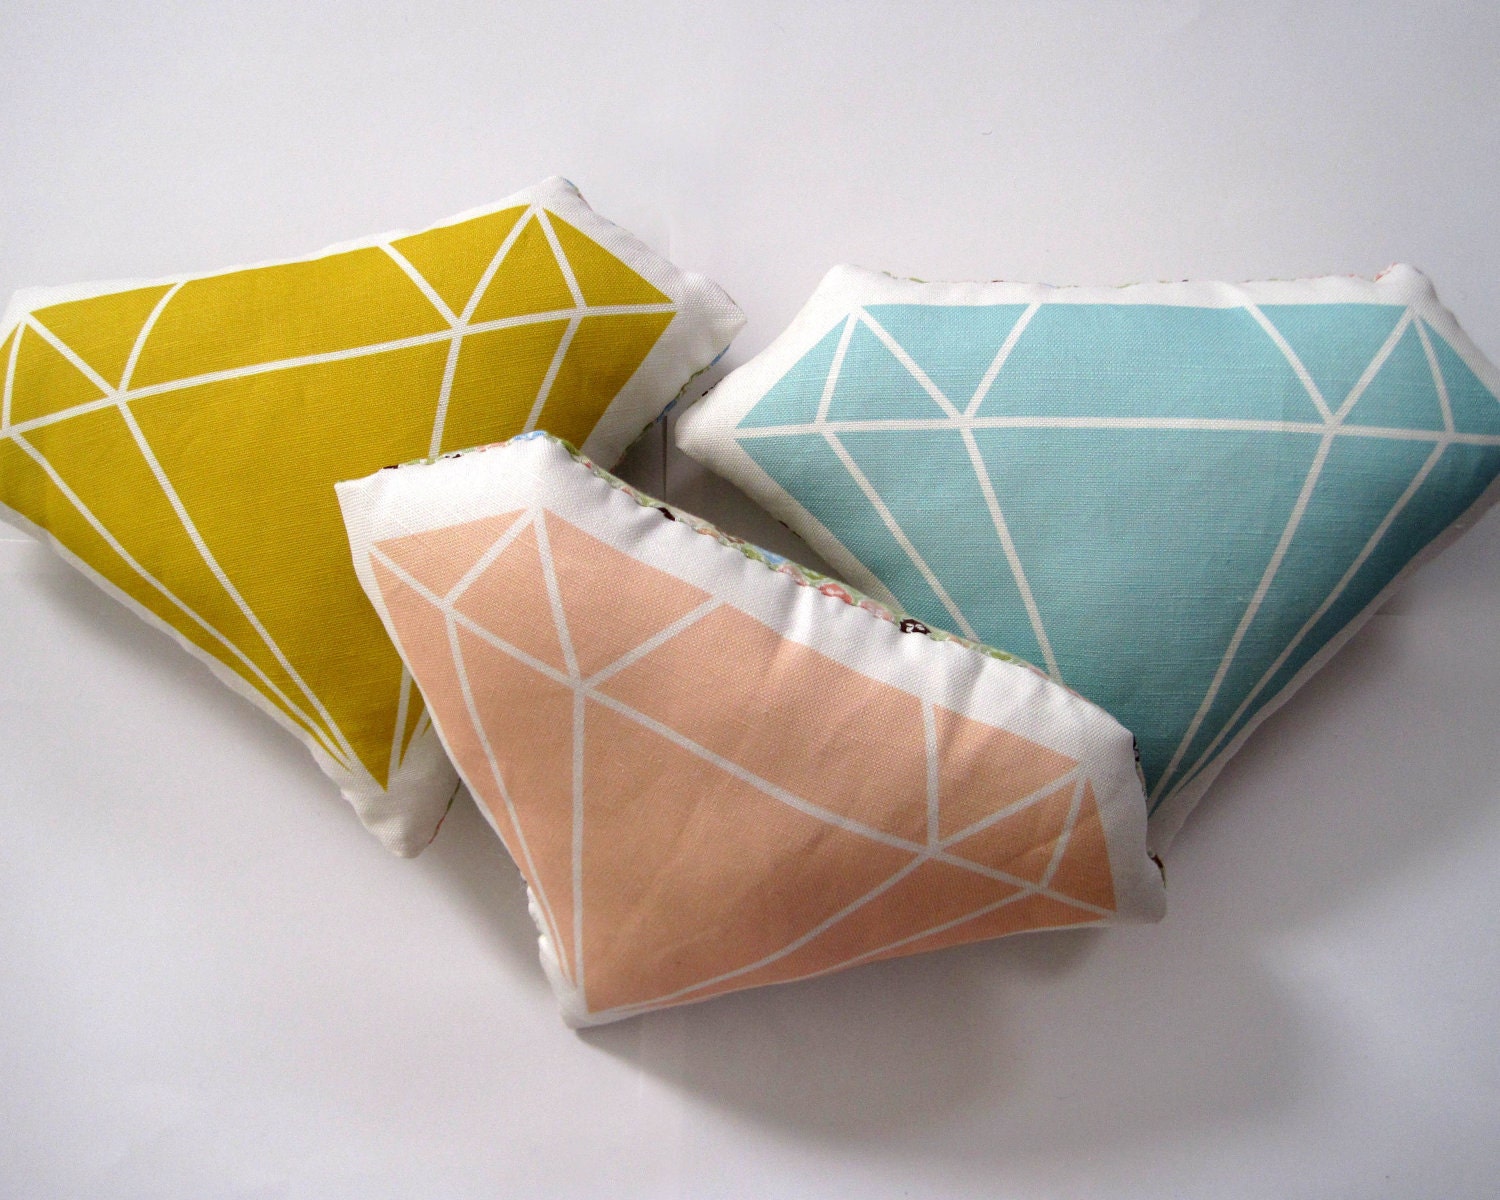
I noticed a TON Of new "hearts" in my shop on Etsy for my Diamond Plushies. I also was getting a ton of email inquiries about them.


I didn't think anything of it since I notice at times a random item from my shop will be the "it" item of the week. That was until I got a message on etsy that said "HEY! are you restocking these diamond plushies? I Saw them on Rue".

**light bulb**

Hold.The.Effin.Phone.

I'm thinking to myself "there is no way this chick means Rue Magazine...."

Sure enough staring back at me on Page 12 of their Spring Edition magazine was one of my diamond plushies.


wha the WHAAAA?!

I am so incredibly honored to be up there with the likes of J Crew, Madewell, Crate & Barrel etc

And can't you just die from this color combo they chose?!

Guys, for once I don't even know what to say.

Thank you Rue Magazine for showing AMAZING love to Yellow Heart Art, I honestly can not thank you enough for the support.

What color combos are you swooning over? I'm thinking peach and navy is my new fav!

xoxo
Leonora

Tuesday, February 28, 2012

Works in Progress! The Spring Fling Edition

whoa it is has been a while since I showed you all some works in progress designs of mine!

Bad Leonora, what is WRONG with you?!

Sorry, I tend to beat myself up sometimes. But we're good now.

As you all know Jessica of Jessica N Designs is one of my home girls. I own quite a bit of her ballin' hand stamped pieces. Her quality and customer service is spot on.

So when she asked me last year to design a handmade holiday banner for her I was all like "girl, please, let's do this".

She loved it so much that she asked me to help her with her "Spring Fling Gift Guide" banner as well!


Doesn't that banner design make ya wanna frolic in a field barefoot while collecting dandy lions and making a dandy lion tiara out of them? (Side Note: Was I the only one who was mind blown when they found out that dandy lions were weeds? No? Just me? Got it.)

Bee Tee Dubs, I was part of Jessica's handmade holiday gift guide back in Decemeber. Basically its like an "online catalog" show casing your handmade goods. I did get a lot of traffic to my shop, if you are interested in being a part of Jessica's spring gift guide then holla at her!

Thursday, February 23, 2012

iPhone/Smart Phone Photography Taken to the Next Level

As some of you may or may not know I actually love photography. Sometimes its just hard to find the time to dust off my 'ol Canon Rebel DSLR and get out there and take some way cool artistic photos. It's also kinda bulky to travel with so on the rare occasion that I do travel I don't even bring it with me.

This really bums me out because there are times when I see a suh-weet photo opp but have no way of capturing it.

Simple solution? Use your iPhone.

say whaaaat.

Now do not get me wrong, I am not saying that your iPhone or Smart Phone should replace your DSLR -or- that anyone with an "iPhone" is declared Ansel Adams. BUT you DO always have your phone on you and it does have a pretty decent lens on it.
Photojojo has some neat little gadgets to take your iPhone/Smart Phone camera to the next level. These attachments are small enough to stick in your purse and the best part? Everyone on instagram will be all like "duuuuude how did you TAKE that?!"

you are welcome in advance for impressing your instagram homies.

Fisheye, Macro, Wide Angle and Telephoto Phone Lenses

These lenses are versatile with MOST smart phones, not just your iPhone! These puppies use magnetism to stay put over your Phone's camera lens.

Use fish eye to get all your posse in a group shot!


 use telephoto to get a close up of your fav celeb that you're stalking in the bushes


 These are totally on my wish list.

Jelly Phone Camera Filters


These can be used with most Smart Phones. The jelly like substance on the back allows it to suction to the back of your phone! These lenses are cheaper than the 1st set of lenses mentioned above that use magnetism to stick to the back of your phone. 

This set allows your photos to have a Starburst, Kaleidoscope or wide angle look.
 
 
Use the starburst affect to make your friends look like super heroes! (or maybe they really are super heroes but choose to have their identities rename anonymous to protect themselves and others)

Holga iPhone Lens


Unfortunately this bad boy is only for iPhones. This is perfect for those of us that miss using film cameras! Turn your iPhone into a holga camera by applying this spiffy case to the back of your phone! Gives you dreamy photos with light leaks and a lo-fi look!


You can even get an awesome "kaleidoscope" look!


What are some techniques you use to spruce up your Smart Phone photos?

oh and bee tee dubs Photojojo did not pay me for this post, I honestly just have a mega camera crush on them and wanted to share their amazingness with you all. All photos in this post are from photojojo.com

Tuesday, February 21, 2012

Attempting New Things (how to sew a retro deer & cook a bad ass dish)

This weekend was a weekend full of experimenting! I figured I had a whole 3 day weekend to myself why not step up my game a bit and try new things.

I kicked it old school this weekend by channeling 7th grade "home economics" me and attempt to sew a retro deer.


After posting this picture on Insta Gram and Twitter I was so overwhelmed by all the positive responses! But, unfortunately this lil guy is not a new business adventure, I just wanted to see if I could pull it off.

What you don't know is:
-this fella took me 3 frekkin hours to make
-lost count of the numbers of times I stabbed myself
-I used the ears from the pattern which would have been great if it didn't make my deer look like Yoda and Dumbo did the horizontal tango and had a baby, so I had to take apart the ears and improvise.
-I used a pretty thick weight felt which was next to impossible to turn my deer right side out to stuff it. I had to jab scissor blades into the neck and legs of this thing to poke them out-it was a borderline horror show, I even had to look away at one point, the violence was too much.
-speaking of the neck how the HECK does one sew a head onto a neck? Needless to say there is a reason why bub dubbed this guy "Franken-Deer", it looks like there is a series of bolts around its neck keeping it in place. I think it adds whimsy, bub thinks its creepy. He might be right but I will never admit that to him.
-for round 2 I'm going to staple and hot glue the hell out of this thing and call it a day.

If you too want to stab yourself multiple times and curse repeatedly to yourself over and over again then you can find the pattern to this little guy over here and make one yourself! Our deers can get together for a play date.
(img via)


Also another venture I decided to tackle this weekend was trying a new crockpot recipe. I decided to give this recipe a go.

(img via)

and can I tell you? It.was.EPIC. Unlike my deer I will be making this dish again.

-6 chicken breasts
-salsa
-taco seasoning
-6-8 hours on low in the crock pot
-bada bing

The only bummer about this dish is that it is NOT "guest" friendly. When I put the pulled chicken and salsa mixture into the burrito shells and rolled them up they quickly started to leak. Thats why I don't have my own pics here, bub and I had to woof down these burritos before they drowned in their own  glorious slow cooked juices.

It was so messy that after each bite we had to take a bath.

But it officially made it into the dinner rotation, I proudly pat myself on the back.

Also there is something else you need to know about me. I am going to ban myself from any and all pet stores from here on out (ok thats a bold face lie) the problem is sometimes I think I'm snow white and want to frolic in a field full of animals while I sing to them all and twirl around in a giant circle all day long. Seriously, can that be my day job? "animal-singer-twirler-arounder"? No? it can't? Well then…

(she's so bad ass, img via disney)

Ok, back to my story. Bub and I are HA-UGE dog lovers. Unfortunately our land lord won't allow us to have a dog which is completely understandable. Since bub flat out refuses to take me to the puppy store since he knows point blank a puppy or 5 will "accidentally" end up in my coat jacket, purse and hat. As a compromise he takes me to PetCo so we can play with the birds.

Well, this planned backfired on him as well. While playing with the birds I flashed bub that look. That "OHMYGODCANWEPLEASETAKEABIRDHOMEIPROMISETOLOVEITFOREVERANDEVERRRRR" look.

(buy meeeee)

He spoke to our landlord and she was on Team Bird. So yesterday we picked out the cutest pearl cockatiel and are picking him up today! (Ok well we dont know if its a HE or a SHE since its too young to tell, apparently birdie parts aren't on the outside of their body) I have already spoiled the heck out of this bird since I want to buy it a mini basketball court and a sweater vest. Bub is immediately regretting this decision. I mean come on, it's not like I'm getting matching sweater vests and already planning our 2012 christmas card….yet

Friday, February 17, 2012

How To Balance Your Business and Social Life

Guess where I am today?


I'm over at Just Lovely Things telling you how to have fun with your business and enjoy a social life at the same time!

Why doncha jump on over there and join me? (Lame pun or awesome play on words? I'm gonna go with awesome...)


X's and O's
Leonora

Thursday, February 16, 2012

I gave in to colored denim

Hello Loves! I know I have been MIA on my blog, but it's because I have been brewing up new designs for the shop and collaborating on some projects with 2 lovely ladies. More deets on that in the future ;) I know, I'm so cryptic sometimes.

But if you all follow me on the twitter (do you think we should start calling twitter "The" Twitter? Like, ya know, kick it old school like how facebook used to be "The" facebook? No? Ok, good idea, I didn't like it either) but anyway I asked a question yesterday in regards to colored denim.

I want to so badly hop on this band wagon and be all like "hey guys! Look at my ass! ITS GREEN!" 

 But it scares me.

It scares me a lot.

I'm pretty sure I'll give into this trend, I gave into capris (something bout awkwardly cropped pants freaked me out too, I really hate it when my ankles are cold.) I gave into leggings and I gave into jeggings (oooo jeggings how I am so glad you came into my life--it's like wearing the "black tie" version of sweat pants. Can someone point me in the direction of the lovely person who invented jeggings? Pretty sure we need to make out)

I was shocked with how many of you were on "TEAM COLORED PANTS!". You all were so encouraging and really wanted me to ride the colored pant train.

You guys, here is my huge announcement. Can I ask that all cell phones and electronic devices be turned off at this time while I tell you all something super exciting?


*Ahem*


I gave in. Yes, I Leonora Jennifer Last name with held due to the fact that you can google me has decided to give this a go. After looking at a plethora of colors I decided to go with green pants. I have a lot of neutrals and navy blue so I thought it was a best bet.

Check out how I would work my awesome green pants:


1. Khaki Crop Jacket from ModCloth
2. Green Denim Pants from Target
3. Coral Flats from Delias
4. Colored Block Totes from Old Navy
5. Navy and White Tank from Abercrombie and Fitch

So, what color denim do you swear by and how do you style it? I need ideas!

xoxo
Leonora

Wednesday, February 8, 2012

Make Up Tutorial! Get rid of dark circles

A while ago I tweeted out there in twitter land about potentially posting a vlog about what I do to get rid of my dark under-eye circles.

No joke they.are.BAD.

So bad that everyone kept saying "um hey ya got some mascara under your eyes"

and I had to be all like "no, thats just my face, thanks for pointing it out".

Then it got real awkward real fast, so I would always have to throw in some random comment bout the NY Yankees to change the subject (I dont even watch baseball)

To my surprised a TON of you wanted a vlog. I was stoked at first but then i was all like "oh, hey, now I gotta show everyone my bags".

As I started to warm up to the idea of showing you guys what-mah-mommy-gave-me I realized that I don't have any good "video recording equipment". You wouldn't be able to really notice a "before" and "after" difference since the quality is so bad.

So instead I am just going to go over my routine step by step here and hopefully that helps!

I am using specific products here, I have found these products to work the best for me. I have used many different brands of concealers and foundations, so this is why I am being so specific. The below products are pricy BUT they do work. I have found that when I use the cheaper cosmetics I end up reapplying my makeup all day and end up spending the same amount on makeup since I have to refill it more than the expensive brand that lasts all day. Do you smell what I am stepping in?

Here is your arsenal of supplies:

(I got mine at Sephora, this will be used for concealer ONLY)

4 - Single sided foundation brush
(this will be used for powder foundation only)

5 - Bare Minerals Foundation Powder

6 - Urban Decay Up All Night Makeup Setting Spray

Step One:
Take your MAC Prep + Prime and place a dot size amount on your index finger and place under your eyes. Make sure all the primer is soaked into your skin. This is important because this primer will allow your concealer to go on your face smoothly. If you skip this step your concealer will go under your eyes blotchy.

Step Two:

Take your double sided concealer brush and use the smaller end inside your Mac Studio Finish Concealer. Get some concealer on your brush and swoop it under your eyes. Do not worry if you look like a gnarly football player, we will fix this. For now just go crazy and apply, apply, APPLY. Do not worry about blending it into your skin just yet, we just want to get the make up on there.

Step Three:

Ok, now put down the brush because I think you went overboard there with the concealer (ha, just kidding, you look great Tom Brady) Now take that same double sided brush and flip it around to the big end. In a downward motion place the brush under your eyes where you went all crazy on your concealer and blend it into the tops of your cheeks. Do this lightly, you don't want to remove the concealer, you just want to blend it into the rest of your skin. IMPORTANT: do not cheap out on the brush here ladies. I one time bought a cheap-o brush and ended up with 1/2 of the bristles on my face. It is worth the investment.

Step Four:
This step might not be necessary for you but I like to take my pinky "pad" and run it along my bottom lash line in case I have a "harsh edge" from the concealer from where my lash line meets my skin under the eye. This just helps soften any harsh edges from the concealer.

Step Five:
Take your single sided foundation brush and dab that into the Bare Minerals Foundation Powder (if you wanted to swap out your make up and use a cheaper version of powder foundation then I give you permission to use it here since the point of this step is to just set the concealer) Take your foundation brush that has your powder foundation on it and dab it on top of the concealer that is under your eyes. DO NOT RUB IT ON you want to "dab" it on. This will help prevent any creasing that might happen. I used to skip this step thinking it was pointless but its kind of a big deal. Also? DO NOT MIX YOUR CONCEALER BRUSHES AND YOUR POWDER BRUSHES. Concealer is, well, for lack of a better term "creamy and wet" you dont want to put a wet brush into a powder foundation or else you will get some gnarly clump concoction of grossness. Do yourself a favor and invest in 2 separate brushes.

Step Six:
You can skip this part if you want, but I figured I spent so much time on my eyes I want it to last haha. I invested in Urban Decay's "up all night make up setting spray". Basically it makes your makeup stay put. Now I know what you're thinking "Umm, hey there Leonora, how do you propose I get this make up setting spray under my eyes if I have to leave my eyes open to spray it…" Well glad you asked. Here is my trick--I take an old blush brush that I dont use anymore, spritz the top of the blush brush with the Setting Spray, then dab it under my eyes! Again DONT RUB IT UNDER you will smear off all your hard work. Bada bing now your dark circles will stay hidden under your concealer for at least 16 hours (whose better than you baby?) Extra Bonus? You can use this stuff for ALL your make up! Squirt some on a Q-Tip and dab onto your eye liner for all day stay! Spray on your face after using some blush so they dont wear off, this product is an AMAZING investment.


I really hope this helped guys! What other techniques would you want to learn?

X's and O's
Leonora